


Building a DM Screen
I only had a somewhat flimsy DM screen made out of paper. I wanted to upgrade to a more sturdy screen with a custom design and the ability to pin my own notes to it.
To make a DM screen like this, you will need the following materials:
- 3 sheets of plywood. I used 8 mm thick poplar plywood. The two side panels are 18 × 22 cm and the middle panel is 36 × 22 cm; you can do any size, but the side panels should ideally be half the width of the middle panel.
- 4 hinges. Mine were 24 × 17 mm.
- 2.5 × 12 mm screws. You can also use longer screws, but you will have to grind them down more.
- Clear wood varnish
Design
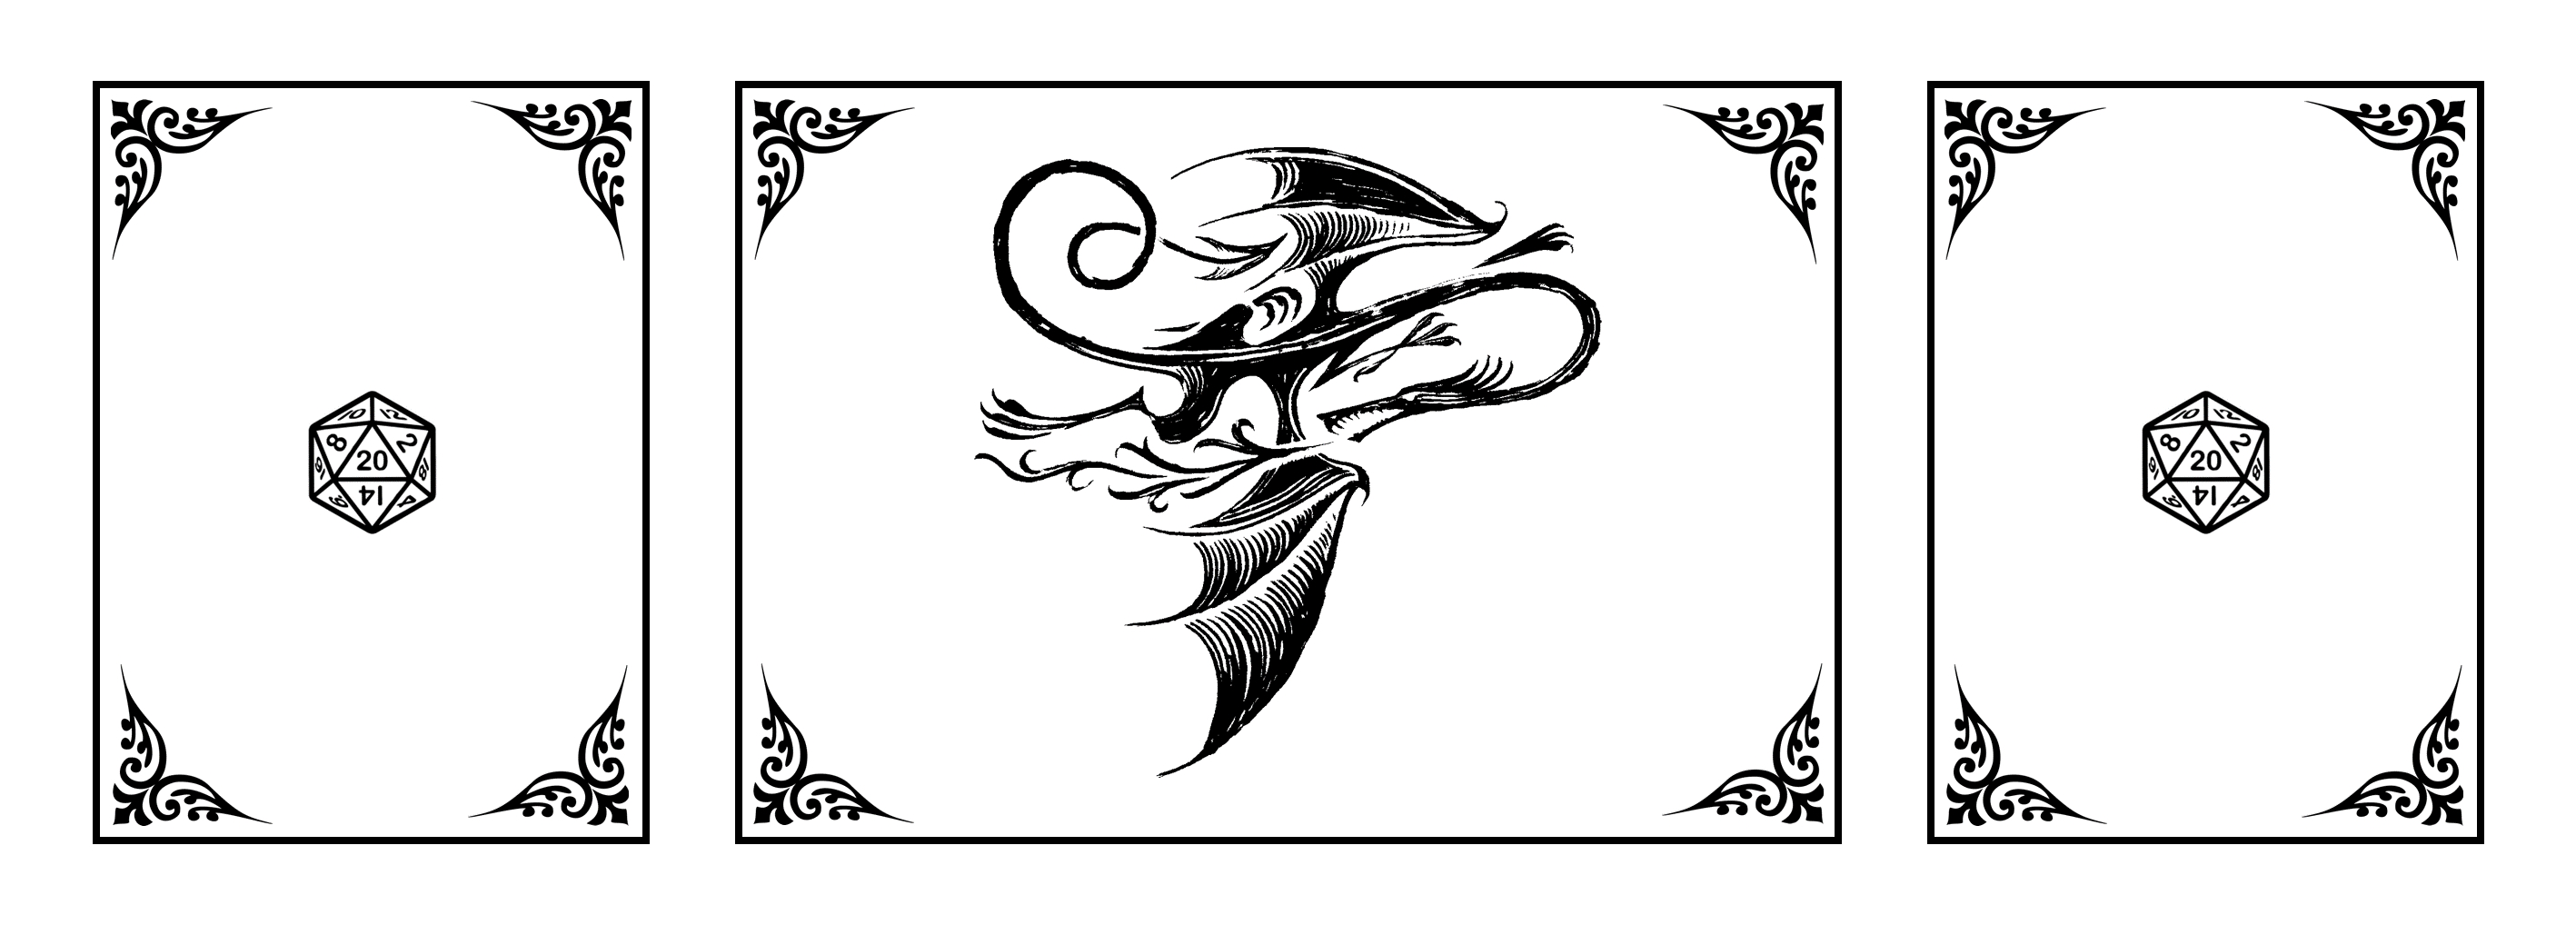
The first step was designing the DM screen. I wanted a somewhat simple design, featuring these floral corner patterns and a central design on each panel. For those, I decided on a D20 and a dragon, which I took from the new hardcover version of Guards! Guards! by Terry Pratchett (GNU). This was the sketch I made in PowerPoint.
I wanted to burn this design into the wood with a laser cutter, which I had access to thanks to a local open workshop. The laser cutter used .svg files, so in the next step I had to turn the raster graphics into vector graphics. This was the result."
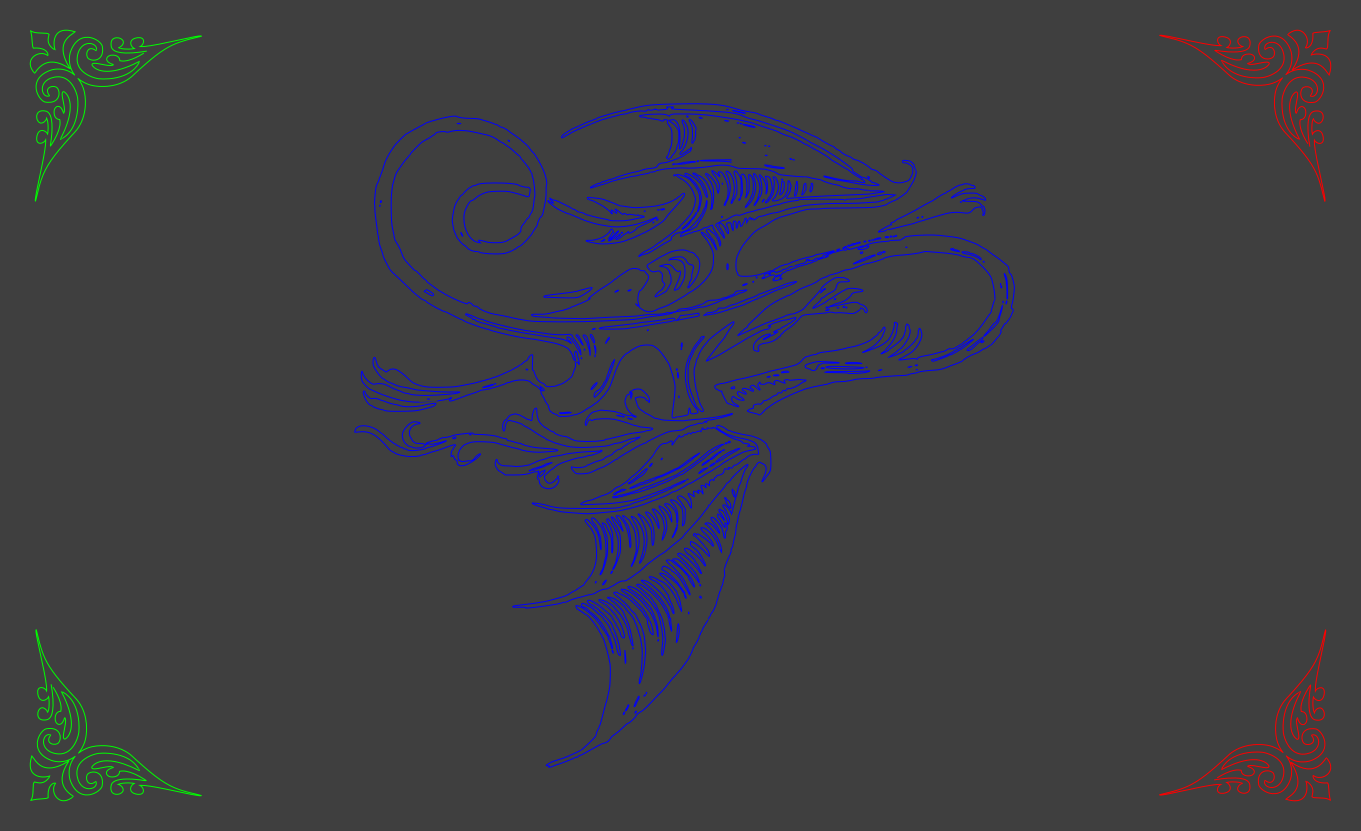
The laser would "fill in" the encircled areas and burn in the designs. Because it moves in vertical lines, I colored the parts that were on the same height in different colors, so they would be burned in separately, one after the other, reducing travel times for the laser.
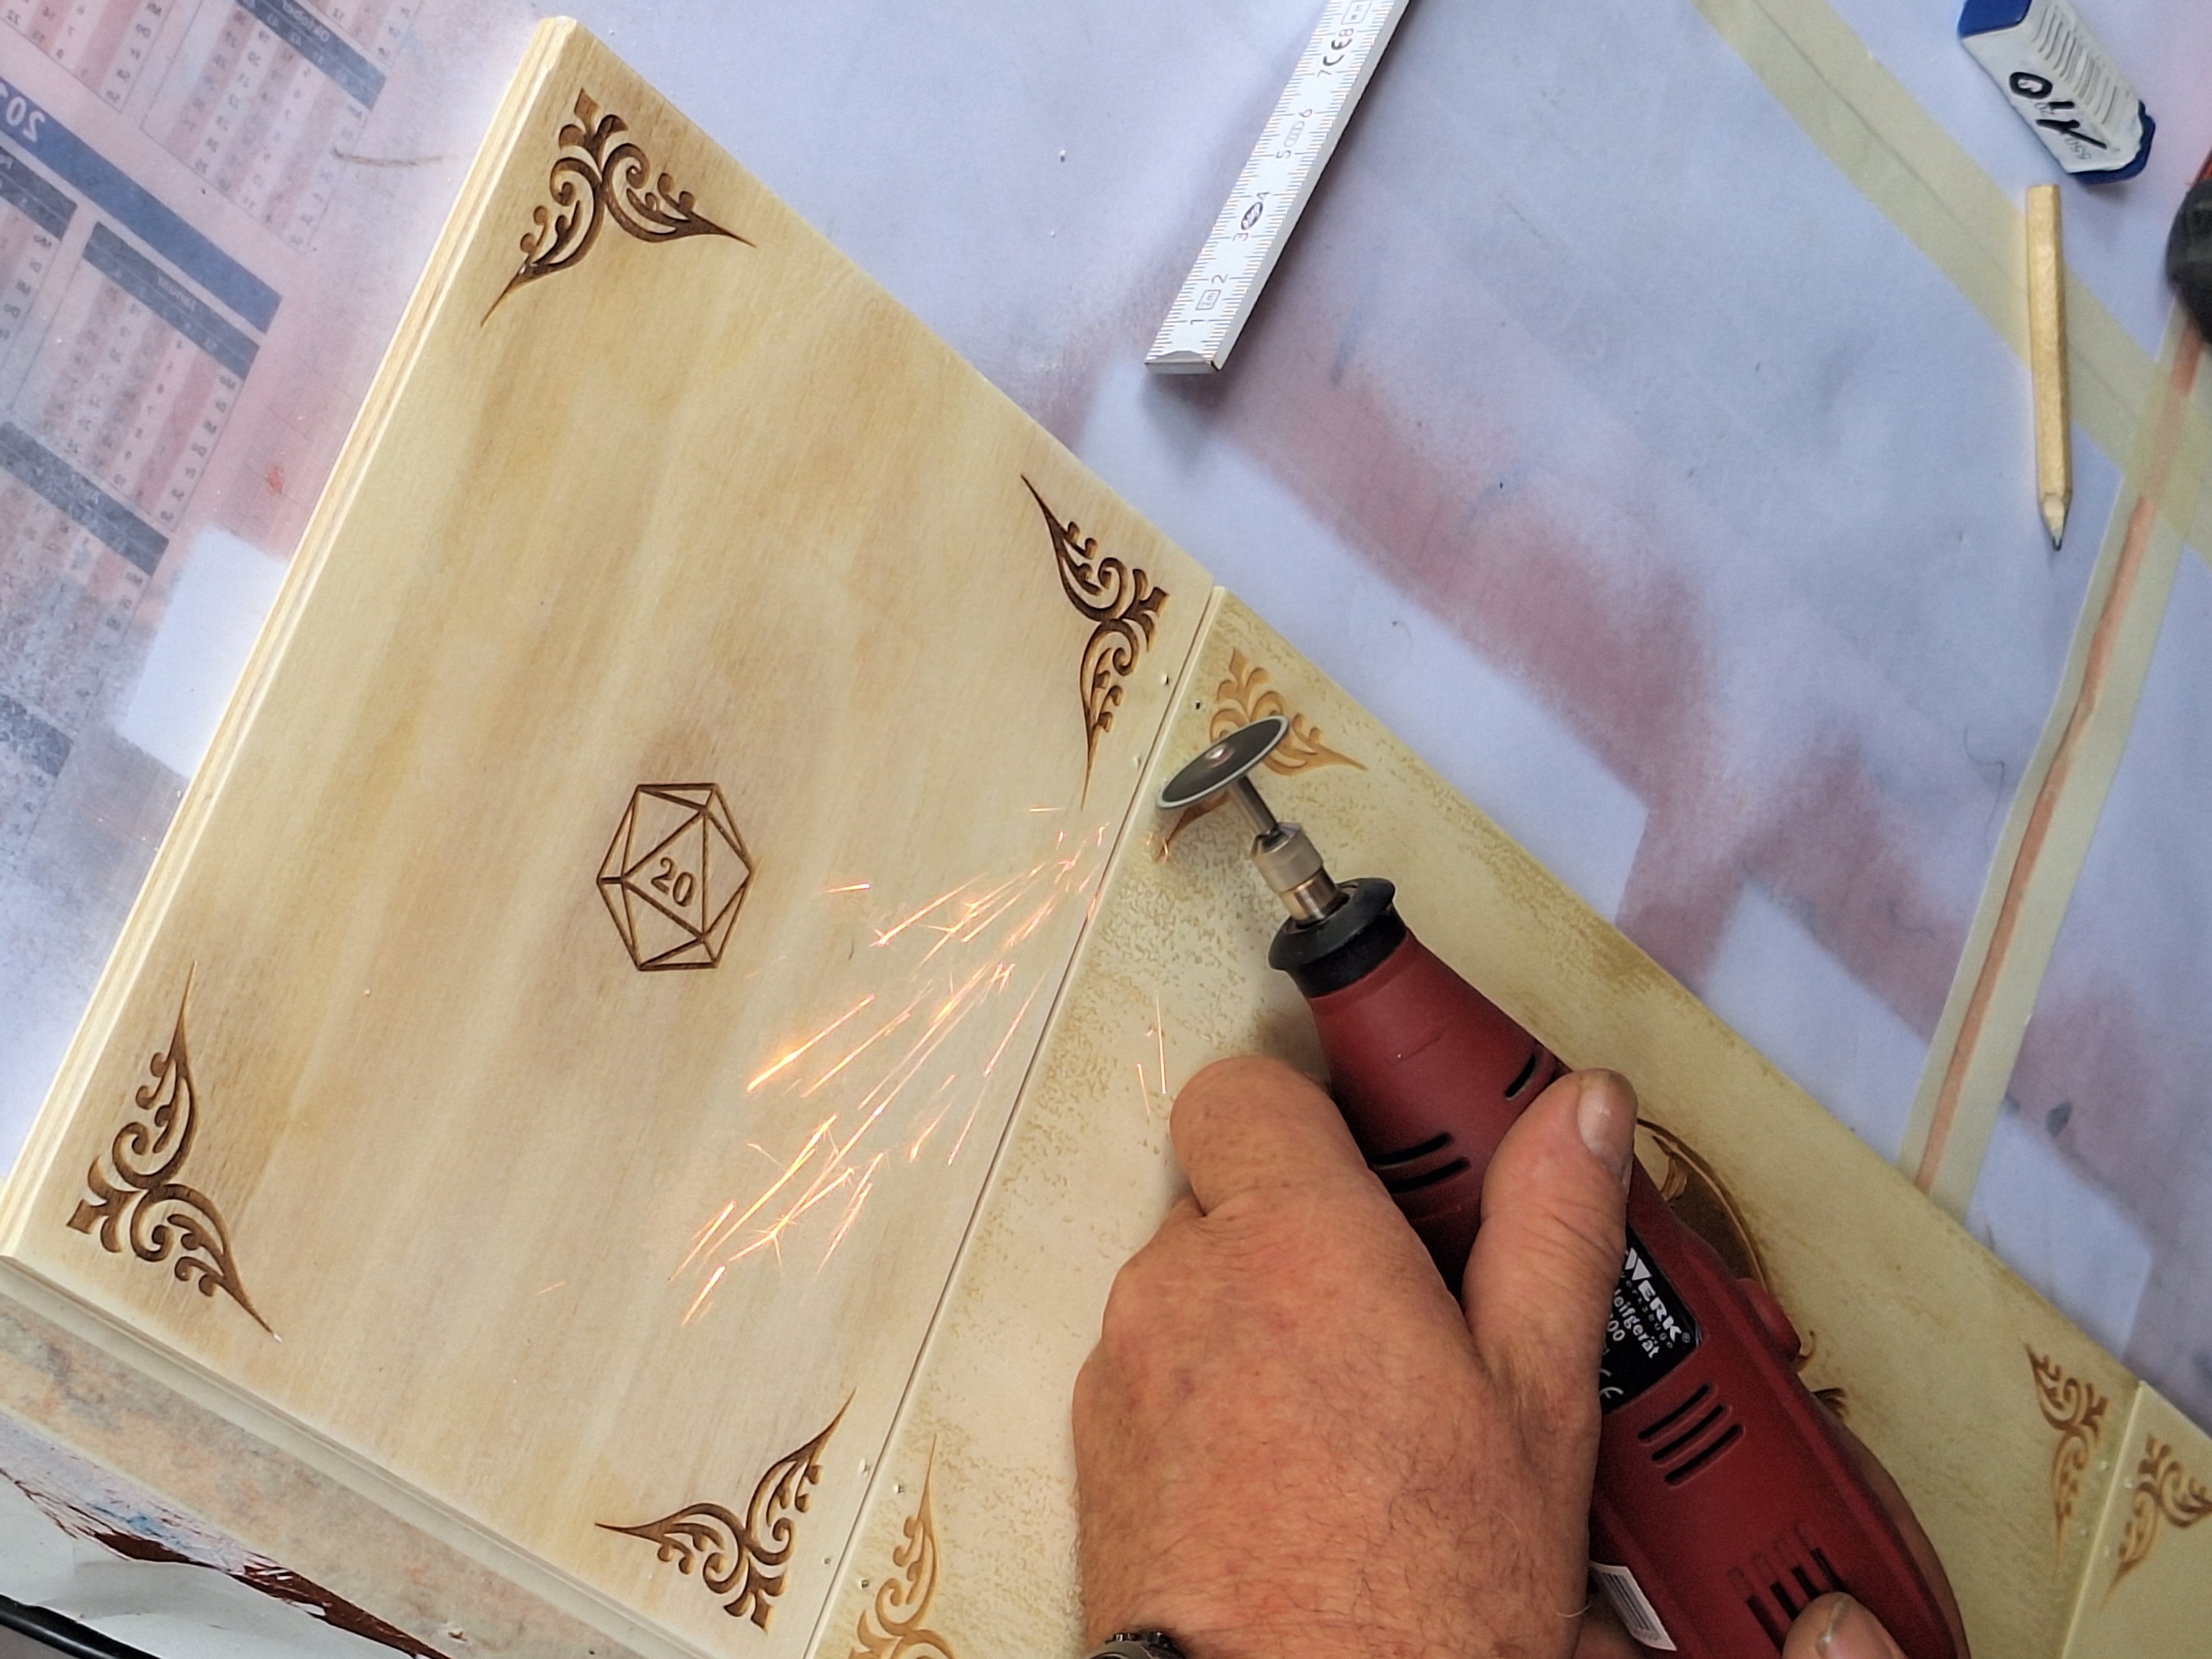
Burning in the Design
The whole process of burning in the design with the laser took about an hour. Thanks again to my local open workshop! If you have something like that in your city: check it out! They're often full of really cool people who can help you with your personal projects.

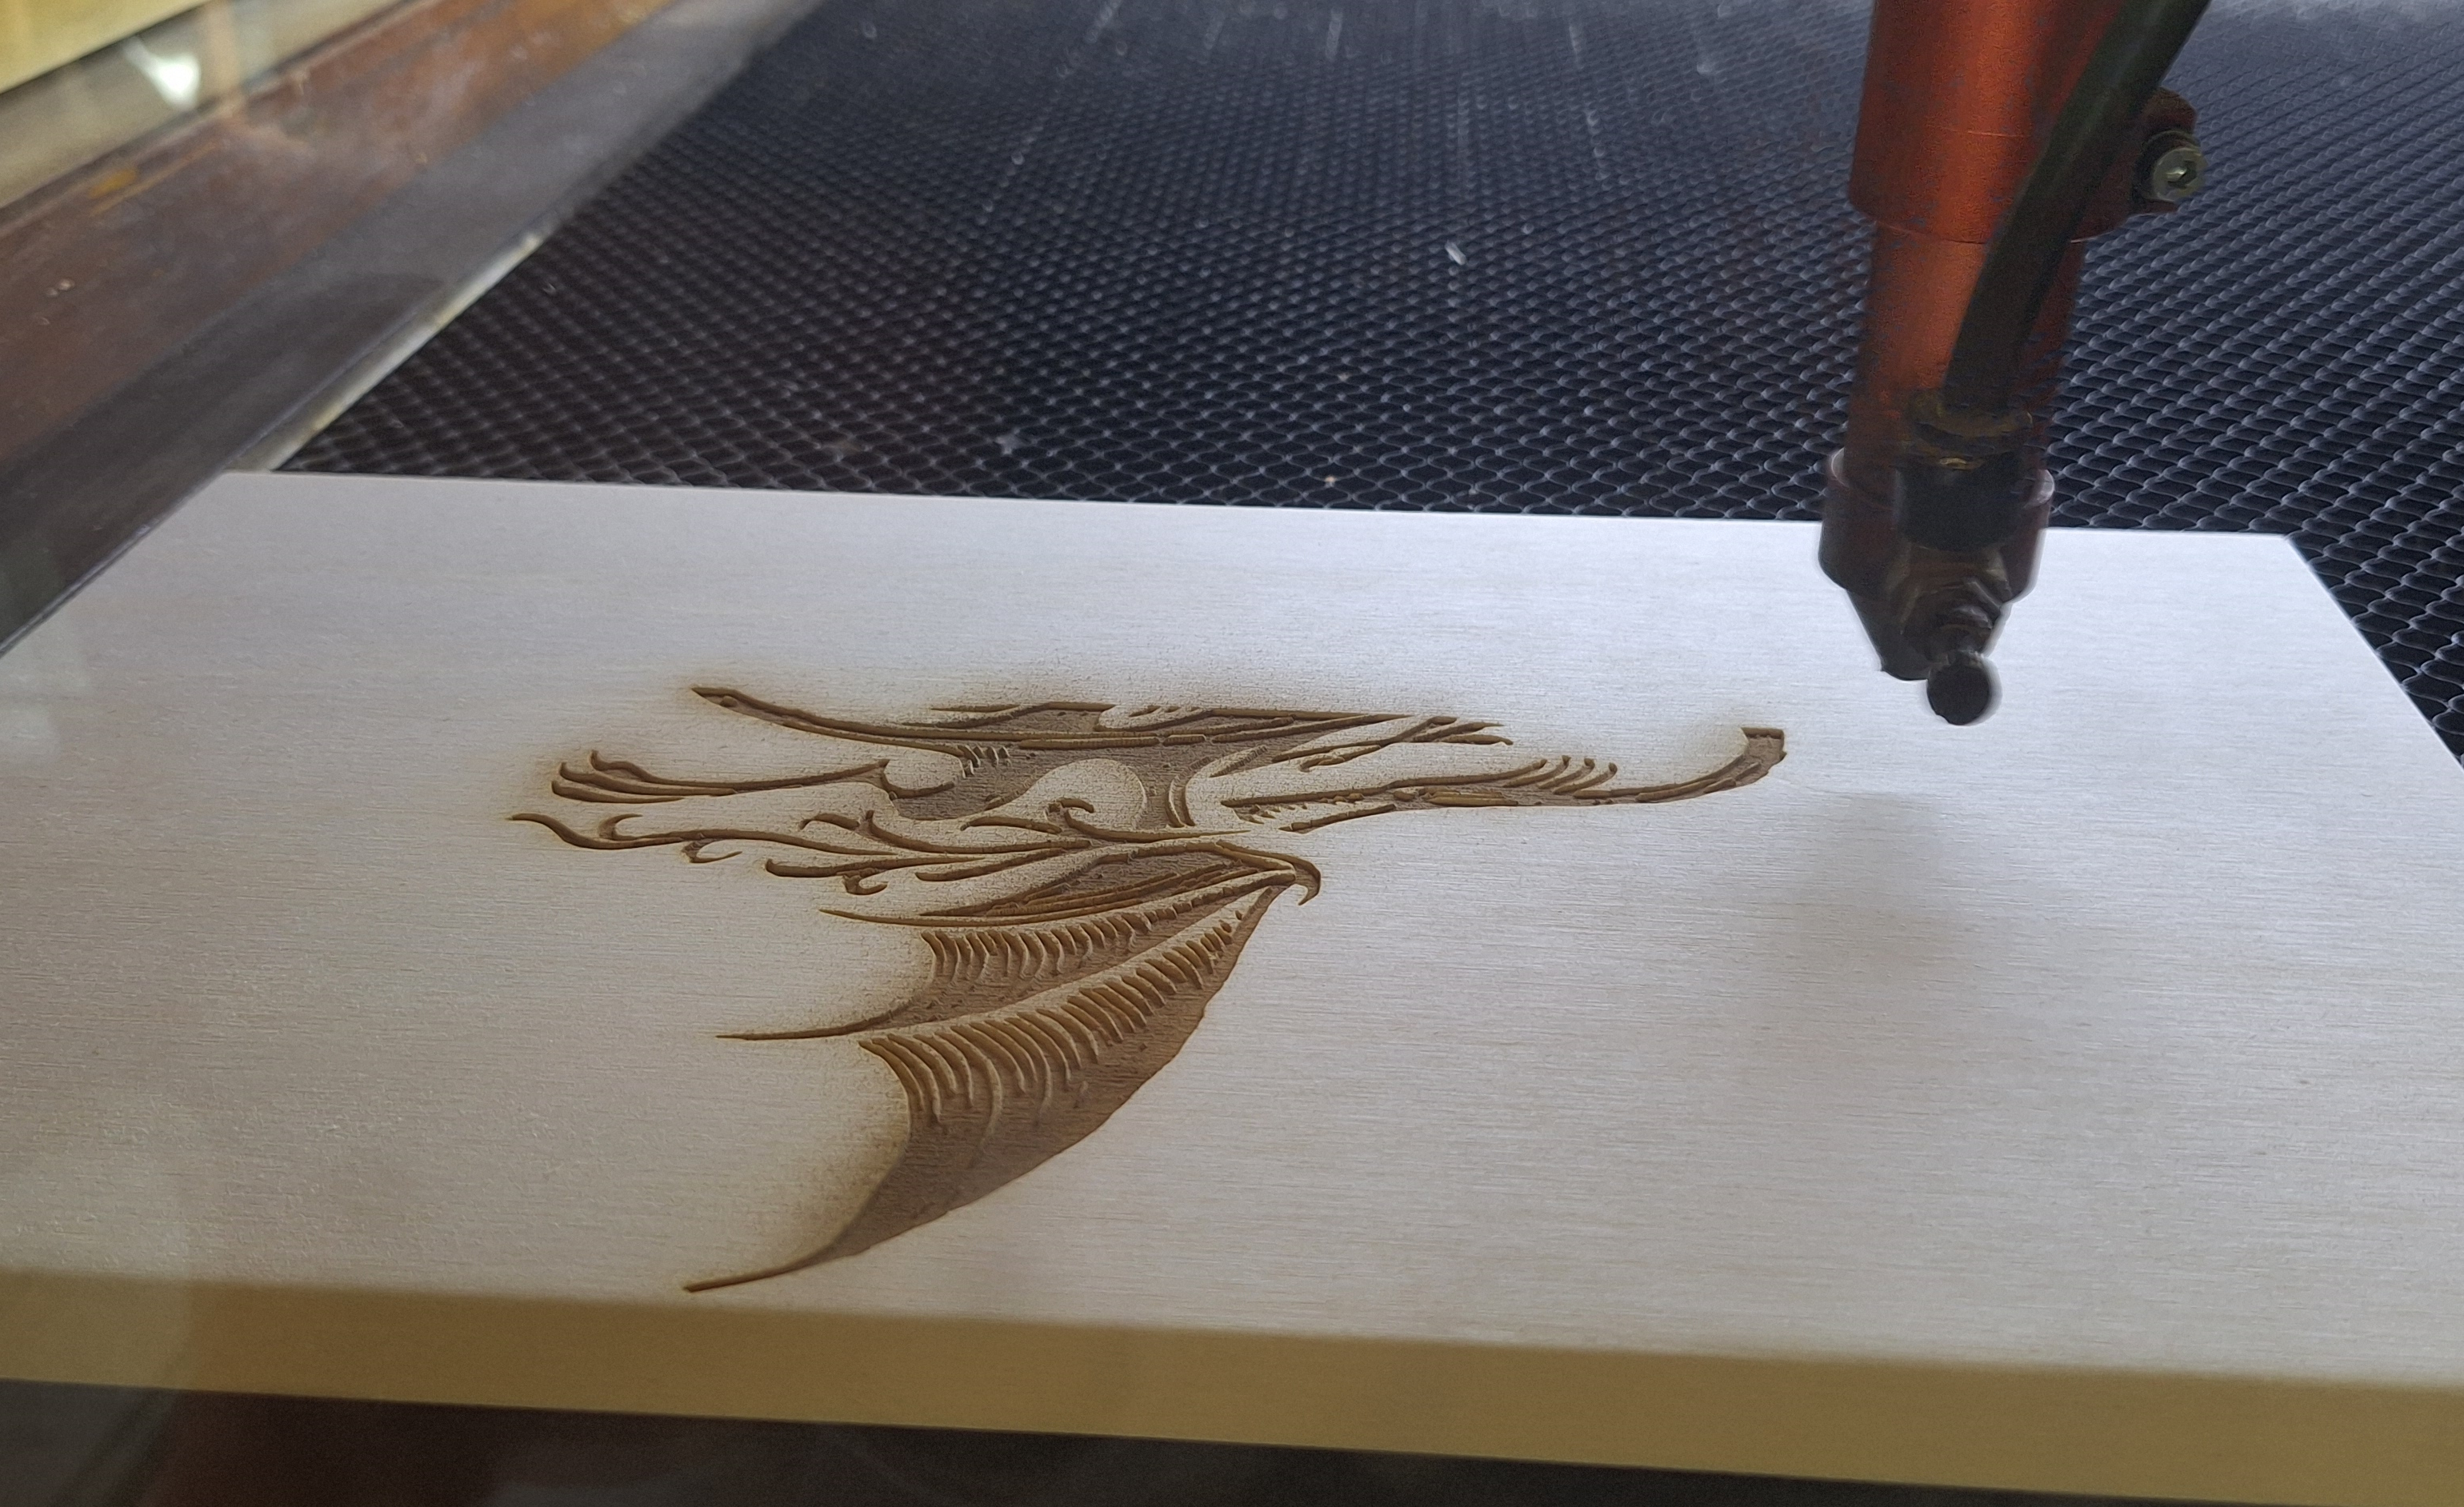
(Sadly, you can't see the laser at work, but it looked really cool!!)
Assembly
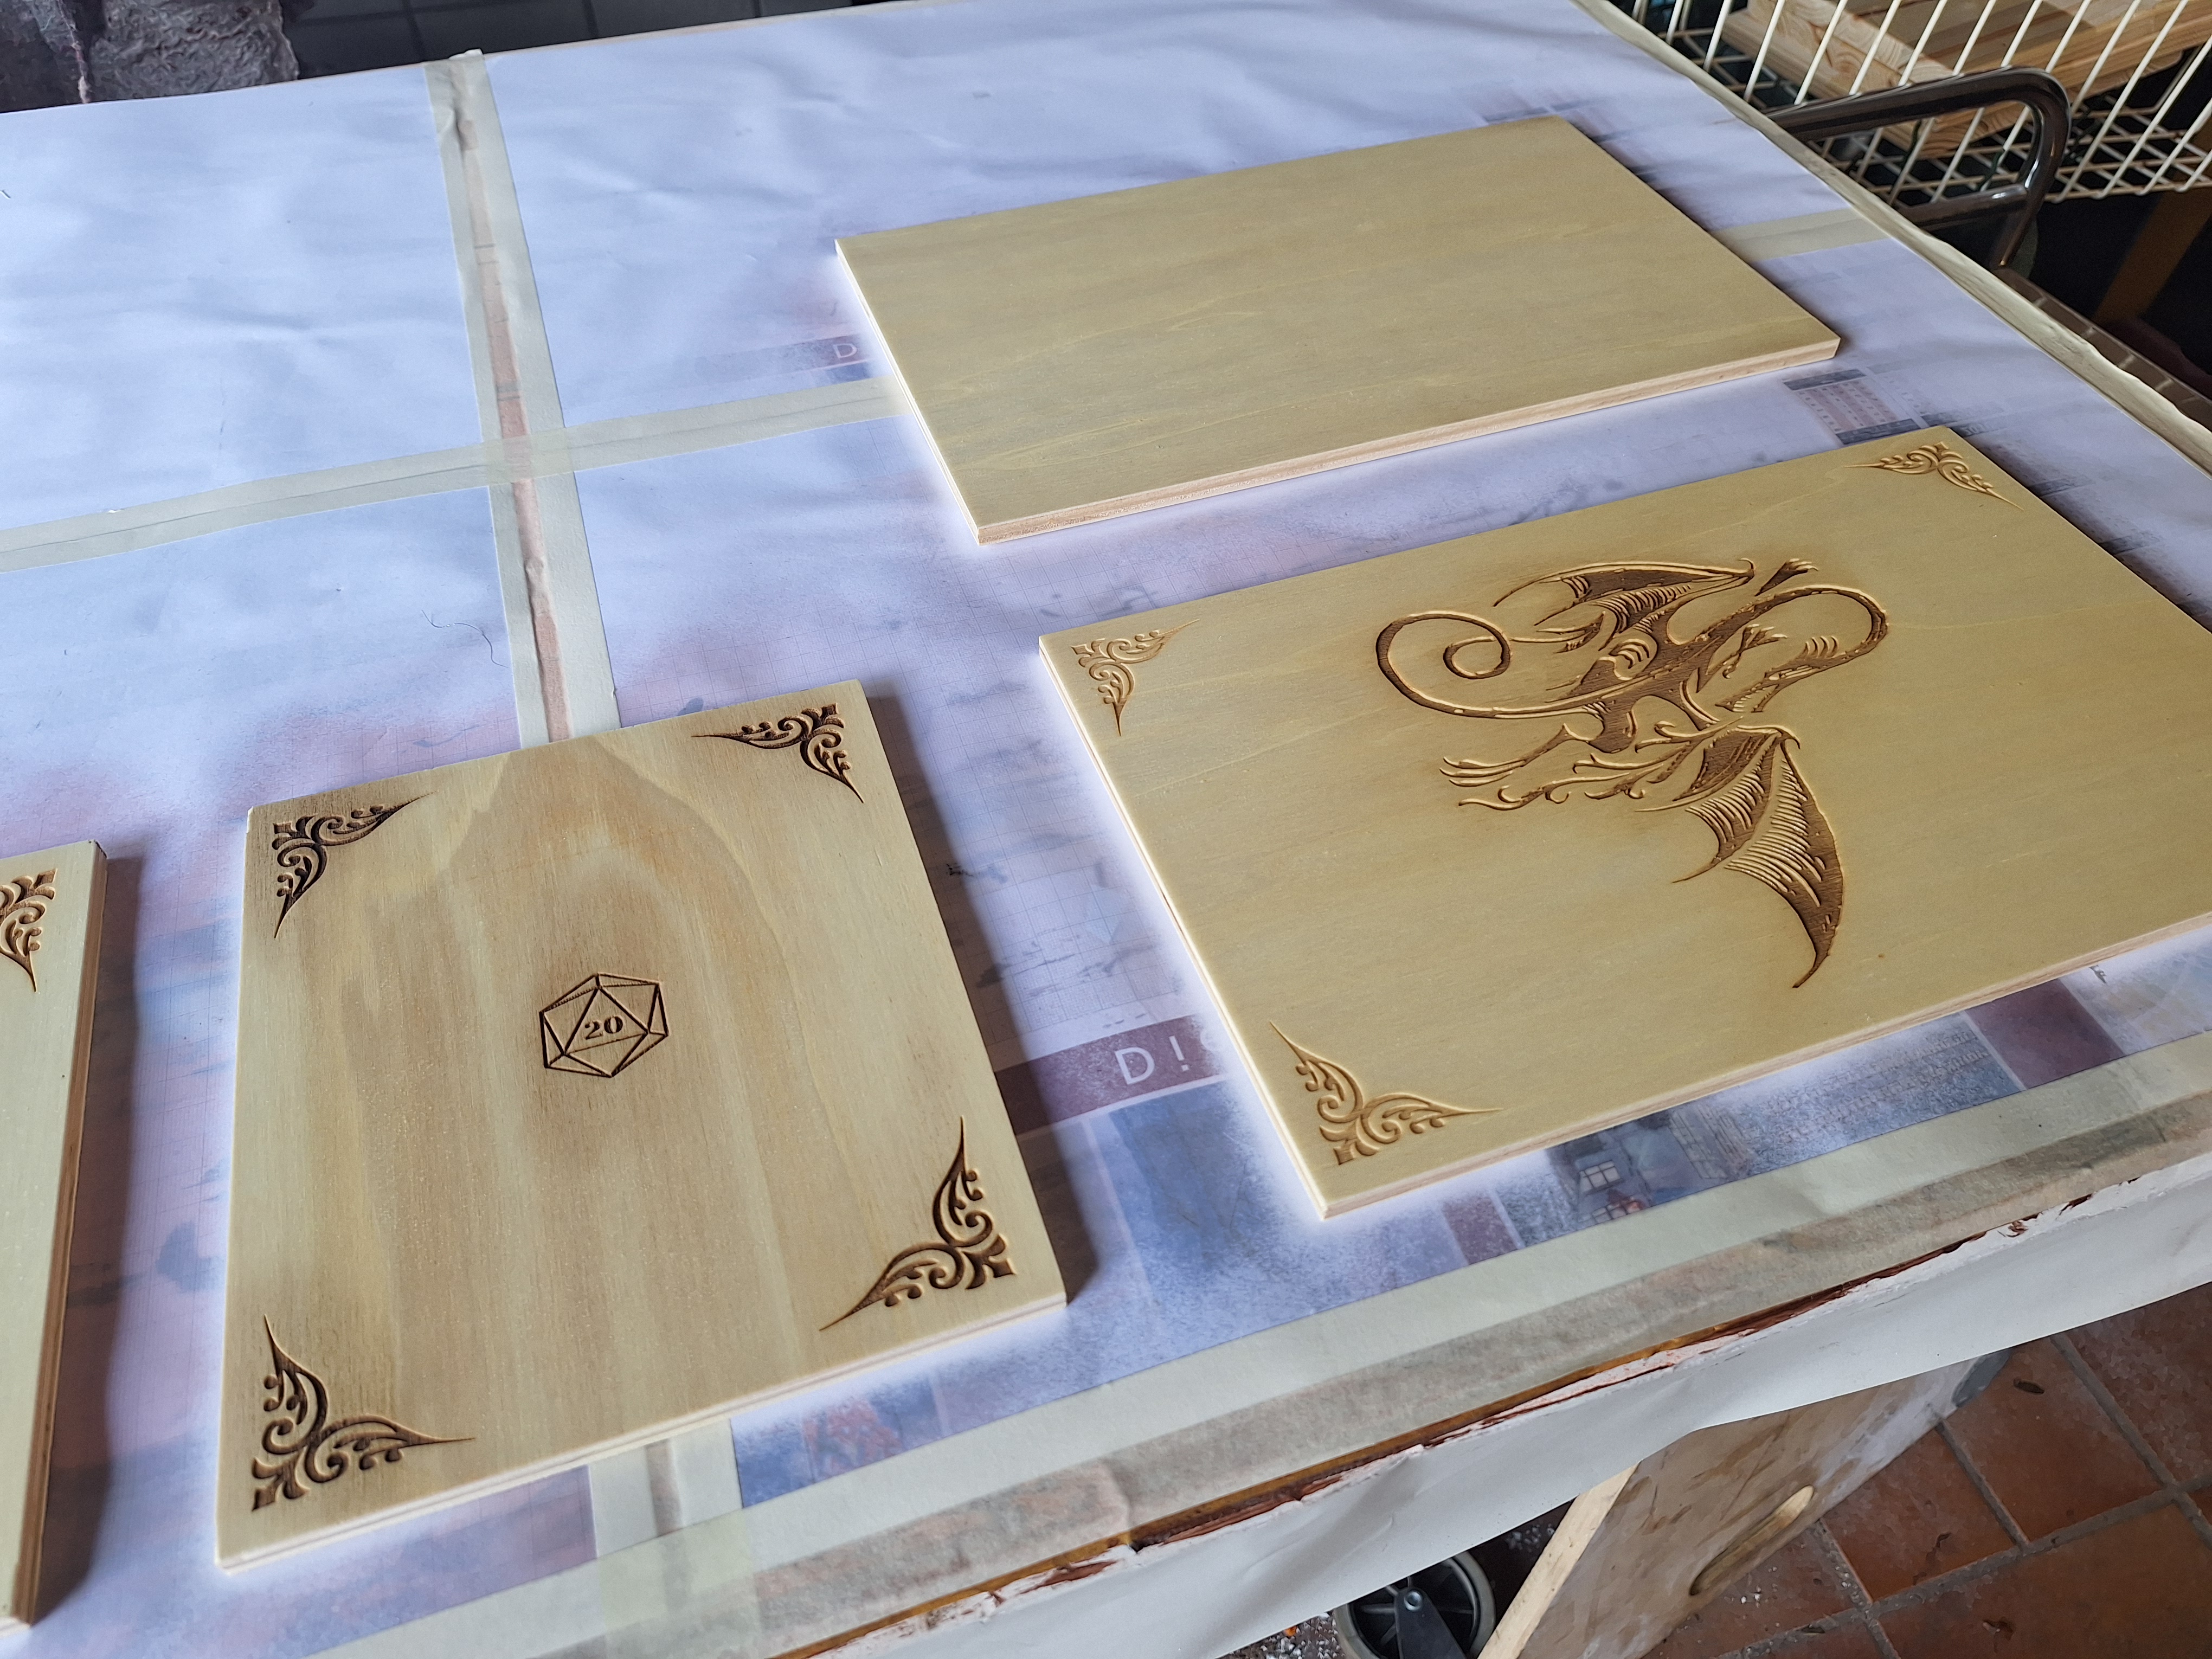
The final steps are finishing and assembling the screen. My dad, who is a craftsman painter, helped me with the next few steps. First I sanded the panels down a bit, to create a smoother surface. I had to be careful, since the dragon design was quite delicate in places and I didn't want to accidentally break off parts of it. After sanding it down, I removed the wood dust with a compressed air blow gun. After that, my dad sprayed on two thin layers of clear wood varnish. You can also apply them with a brush; be careful, though, that you don't leave any streaks in the varnish. The varnish protects the wood from staining and makes the colors a bit more vibrant. Finally, I lightly sanded down the panels again.
Next, I attached the hinges. I placed them 2cm from the top and bottom on the inside of the panels, marked the position of the holes, drilled the holes and then screwed on the hinges. The screws were sadly a bit too large for the hinges, so the panels don't fully close. Try to see if the screws fit neatly into the hinges before buying them, if you can. In the last step, my dad grinded down the protruding ends of the screws on the front of the panels
Final Results
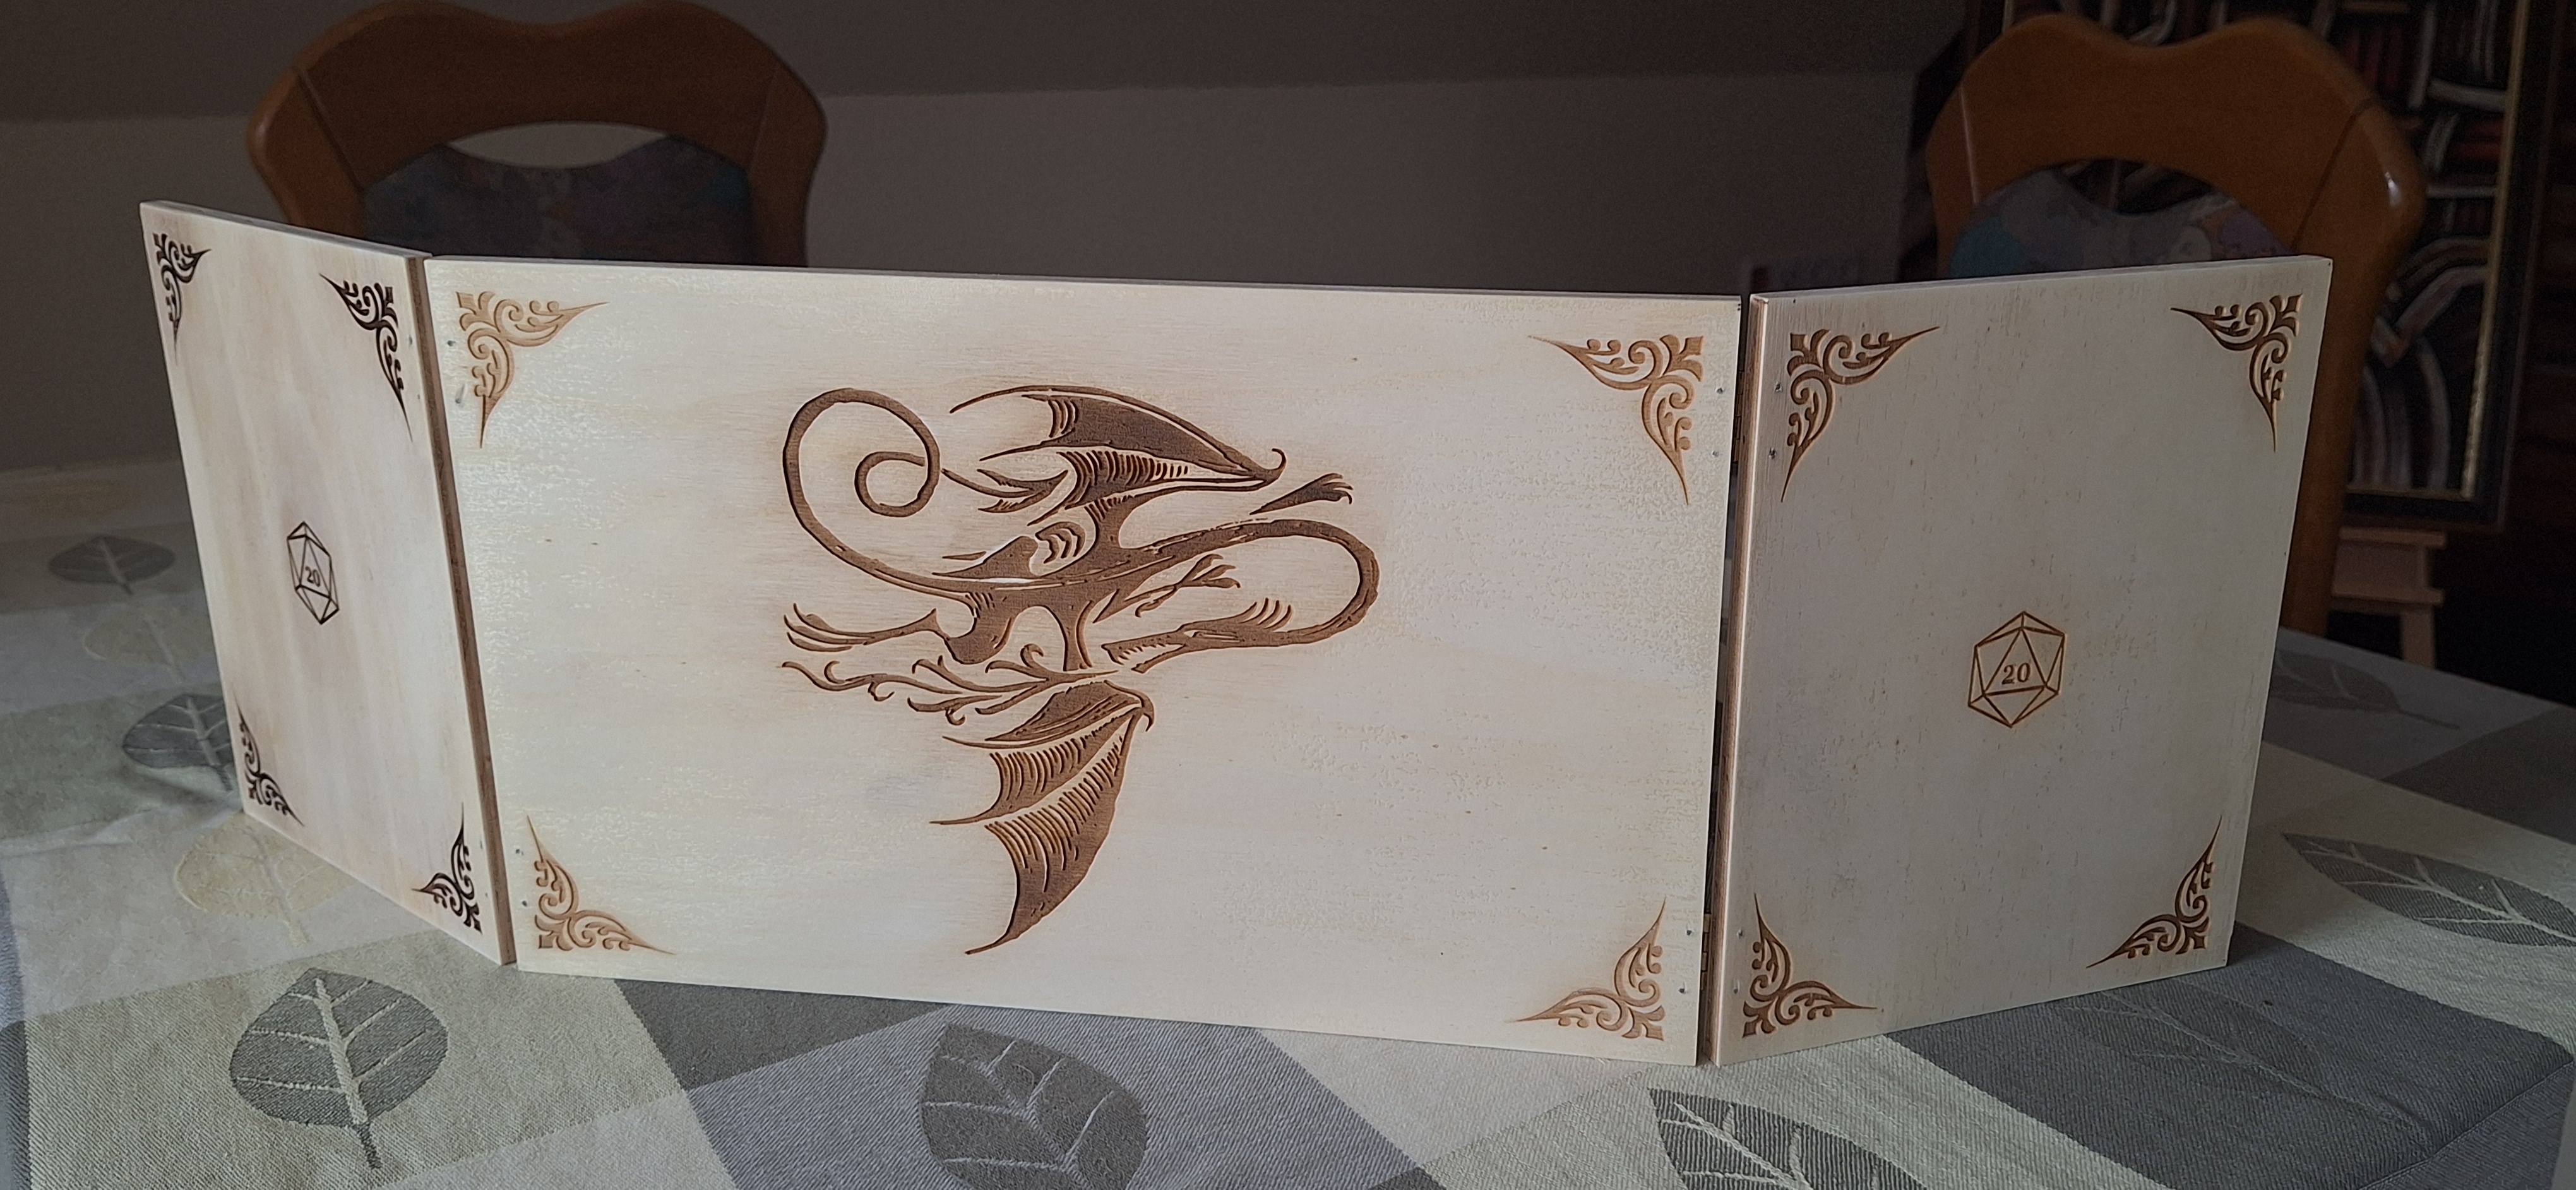
I really like the final result. The design looks nice, the screen has a good size and I can use binder clips on the top of the panels to put up my own notes on the inside. Considering this was the first project of this sort I ever did, I'm quite happy.